
FBA PACKAGING AND SHIPPING
How to Prepare Your First FBA Shipment — Complete Step by Step Guide
By Brandhunterz Ltd | Company No: 15342697 | 15 minute read
Affiliate Disclosure: This article contains affiliate links. If you purchase through our links we may earn a commission at no extra cost to you. We only recommend tools we genuinely use and believe in. Read our full disclaimer.
Sending your first wholesale stock into Amazon FBA is one of the most significant milestones in your selling journey — and also one of the moments where new sellers make the most costly and avoidable mistakes. Amazon has strict requirements for how products must be labelled how shipment plans must be created how boxes must be packed and how pallets must be built if applicable. A shipment that does not meet these requirements gets rejected at the fulfilment centre — costing you time additional courier fees and in some cases disposal fees on unacceptable stock. Getting the process right the first time protects your capital and gets your products live on Amazon earning sales as quickly as possible.
We are Brandhunterz Ltd — a UK registered wholesale sourcing company (Company No: 15342697) — and in this complete step by step guide we walk you through every stage of preparing and sending your first Amazon FBA shipment — from receiving stock from your wholesale supplier through to creating your shipment plan in Seller Central labelling every unit packing your boxes and booking your courier.
💡 Quick Summary
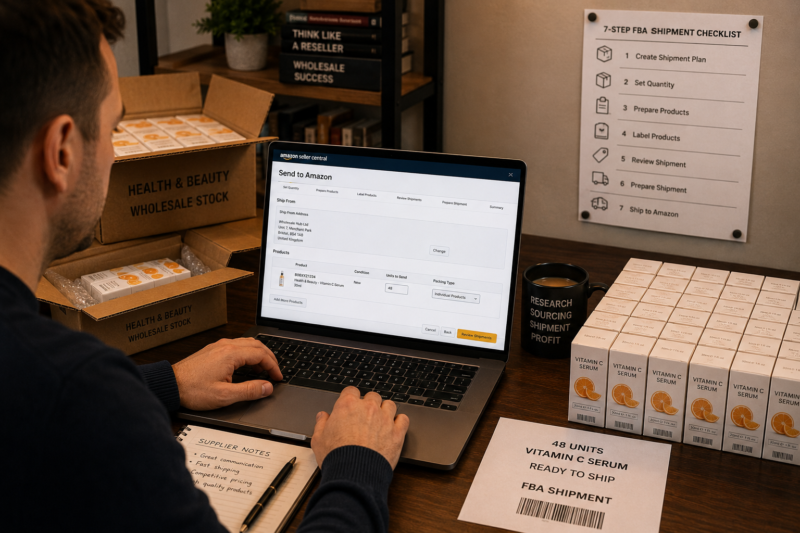
Preparing your first FBA shipment has seven stages — receiving and checking stock from your supplier applying FNSKU barcode labels to every unit creating a shipment plan in Seller Central assigning products to the plan packing boxes to Amazon’s requirements applying box labels booking your courier and confirming shipment dispatch in Seller Central. Every stage must be completed in sequence and every Amazon requirement met before your stock is accepted at the fulfilment centre and made live for sale.
What You Need Before You Start
Before you begin preparing your first FBA shipment make sure you have all of the following in place. Missing any single item will stop you at a specific stage of the process and delay your stock going live:
| Item Required | What It Is | Ready |
|---|---|---|
| Amazon Seller Central account | Active Professional selling account — Individual plan cannot create FBA shipments | ☐ |
| Stock received from supplier | Your wholesale order delivered and counted — units match invoice quantity | ☐ |
| FNSKU labels printed | Amazon-generated barcode labels for each product — printed on 30-up A4 label sheets | ☐ |
| Double-wall cardboard boxes | New or good condition boxes — maximum 50kg gross weight — maximum 63.5cm any one side | ☐ |
| Packing materials | Bubble wrap or packing paper — void fill — heavy-duty packing tape | ☐ |
| Label printer or laser printer | Thermal label printer recommended — standard laser printer with label sheets also works | ☐ |
| Courier account or booking method | Amazon Partnered Carrier or independent courier — UPS DHL or Evri for small shipments | ☐ |
Step 1 — Receive and Check Your Stock From the Supplier
When your wholesale stock arrives from the supplier do not send it straight to Amazon. First count every unit against your purchase order and supplier invoice. Check for damaged packaging missing items or incorrect products. Any discrepancy must be reported to your supplier immediately — once stock arrives at an Amazon fulfilment centre it is impossible to return to the supplier through Amazon’s system and any shortfall becomes a dispute that is significantly harder to resolve after the fact.
| Stock Receiving Check | What to Do If Problem Found |
|---|---|
| Unit count does not match invoice | Contact supplier immediately — photograph discrepancy — do not sign delivery acceptance until counted |
| Damaged packaging on units | Photograph every damaged unit — set aside — report to supplier — do not send damaged stock to FBA |
| Wrong product received | Do not label or process — contact supplier for return authorisation and correct replacement |
| Expiry date too close — food or supplements | Amazon rejects stock with less than 90 days to expiry — check all units before labelling |
Step 2 — Create Your Shipment Plan in Seller Central
Before you label a single unit you must create your shipment plan in Amazon Seller Central. The shipment plan tells Amazon what products you are sending how many units of each and where you are shipping from. Amazon uses this information to assign your stock to specific fulfilment centres — you cannot send stock to an FBA warehouse without a confirmed shipment plan linked to that stock.
Go to Inventory — Send to Amazon in Seller Central
Log in to sellercentral.amazon.co.uk and navigate to Inventory in the top menu. Click Manage FBA Inventory then select the product you want to send to FBA from your active listings. Click Send or Replenish Inventory to begin the shipment plan creation workflow. If your product is not yet in your Seller Central inventory you must add it as an FBA listing first before creating a shipment plan.
Enter Your Ship From Address
Enter the address from which you are shipping the stock — this is your home address business address or prep centre address depending on where you are preparing the shipment. This address is used to calculate partnered carrier rates and must match the collection address if you are using Amazon’s Partnered Carrier programme.
Select Individual Products — Enter Unit Quantities
Choose Individual Products as your packing type for your first shipment — this is simpler than case-packed products and gives you more flexibility. Enter the exact number of sellable units you are sending for each ASIN. Double-check this figure against your counted stock — any discrepancy between your shipment plan quantity and your actual box contents will create a received quantity discrepancy at the warehouse.
Select Who Labels the Products
Amazon asks whether you or Amazon will apply FNSKU labels. Always select Merchant — meaning you will label the products yourself. Selecting Amazon Labels means Amazon applies the labels at the warehouse and charges you a per-unit labelling fee. For most wholesale sellers self-labelling is faster and cheaper — and ensures labels are applied correctly before stock leaves your control.
Print Your FNSKU Labels
Once you have entered all products and quantities Seller Central generates your FNSKU labels for download. Print them on 30-up self-adhesive A4 label sheets — each label measures 63.5mm x 38.1mm which is the standard size compatible with the 30-up layout. Print one label per unit — you will need exactly the same number of printed labels as the unit count you entered in your shipment plan.
Step 3 — Apply FNSKU Labels to Every Unit
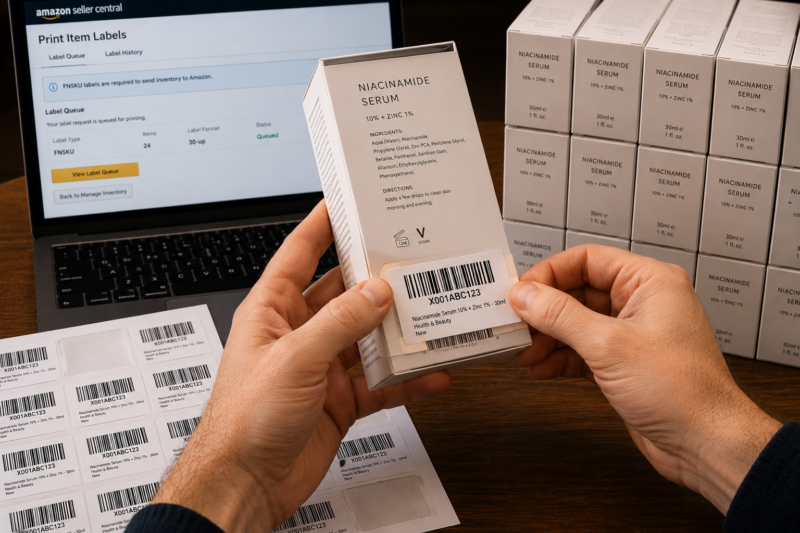
The FNSKU label is what connects your physical product to your Seller Central account when it arrives at the Amazon fulfilment centre. Without an FNSKU label Amazon cannot identify who sent the product and cannot add it to your inventory. Applying labels correctly is one of the most critical physical steps in the entire FBA preparation process.
| FNSKU Labelling Rule | Why It Matters |
|---|---|
| Apply label over any existing barcode | Amazon scanners must read FNSKU only — not the manufacturer barcode — cover all other barcodes completely |
| Apply label flat — no wrinkles or air bubbles | Wrinkled or bubbled labels scan unreliably — warehouse rejects units that cannot be scanned |
| Apply label to flat surface only | Labels on curved or textured surfaces peel off — apply to the flattest available surface on the product |
| One FNSKU label per unit — no duplicates | Multiple barcodes on one unit causes scan confusion — use exactly one FNSKU per unit |
| Label must be scannable at 15cm distance | Amazon tests scannability during receiving — low-quality print or small label size causes rejection |
| Do not label inside poly bags or shrink wrap | FNSKU must be on the outermost surface of the unit as it arrives at the warehouse — never underneath packaging |
Step 4 — Pack Your Boxes to Amazon’s Requirements
Amazon has specific requirements for how FBA shipment boxes must be packed. Meeting these requirements protects your stock from damage in transit and ensures your shipment is accepted without delay at the fulfilment centre. Here are the key packing rules for standard FBA shipments:
| Amazon Box Packing Requirement | Specification |
|---|---|
| Maximum box weight | 50kg gross including packaging |
| Maximum box dimensions — any single side | 63.5cm maximum per side |
| Box condition | New or structurally sound — no damage or holes |
| Box type required | Double-wall corrugated cardboard recommended |
| Sealing tape | Heavy-duty packing tape — H-tape method on all seams |
| Void fill requirement | No movement of contents when box is shaken — fill all gaps |
| Old labels on reused boxes | Remove or fully cover all old barcodes and shipping labels |
| Mixed products per box | Allowed for individual products packing type — one ASIN or multiple ASINs per box |
Step 5 — Enter Box Contents and Print Box Labels in Seller Central
Once your boxes are packed return to your Seller Central shipment plan and enter the box contents. For each box you are sending you need to tell Amazon exactly which ASINs are inside and how many units of each. This box content information is critical — Amazon uses it to locate your specific units in the warehouse without having to scan every product individually at receiving.
Enter Box Content Information
In the Prepare Shipment stage of your shipment plan click Enter Box Contents. For each box enter the ASIN and unit count for every product inside that specific box. If you have packed multiple boxes record the contents of each one individually — the contents of Box 1 Box 2 and Box 3 are recorded separately and each gets a unique box label that matches its recorded contents.
Enter Box Dimensions and Weight
Measure and weigh each packed sealed box and enter the dimensions and gross weight into Seller Central. These figures are used to calculate your shipping cost if using Amazon’s Partnered Carrier. Measure accurately — underreporting box weight can result in additional charges being applied after collection.
Print and Apply Box Labels
Once all box content information is entered Seller Central generates a unique box label for each box in your shipment. Print these labels and apply one to each box — on the largest flat side of the box away from the seam. The box label contains a unique shipment ID and box number that links your physical box to its recorded contents in Amazon’s system. Without this label your box cannot be processed at the warehouse.
Step 6 — Book Your Courier and Dispatch Your Shipment
With all boxes packed labelled and box content information entered you are ready to book your courier and dispatch your first FBA shipment. You have two main options for shipping small parcel FBA shipments in the UK:
| Shipping Option | How It Works | Best For |
|---|---|---|
| Amazon Partnered Carrier — UPS | Book directly in Seller Central — UPS collects from your address — cost deducted from seller account balance | Most first shipments — competitive rates — tracking integrated into Seller Central |
| Independent courier — DHL Evri Parcelforce | Book independently — enter carrier name and tracking number into Seller Central manually | Heavier shipments where independent rates are lower — specific delivery requirements |
Step 7 — Confirm Shipment and Track Receiving in Seller Central
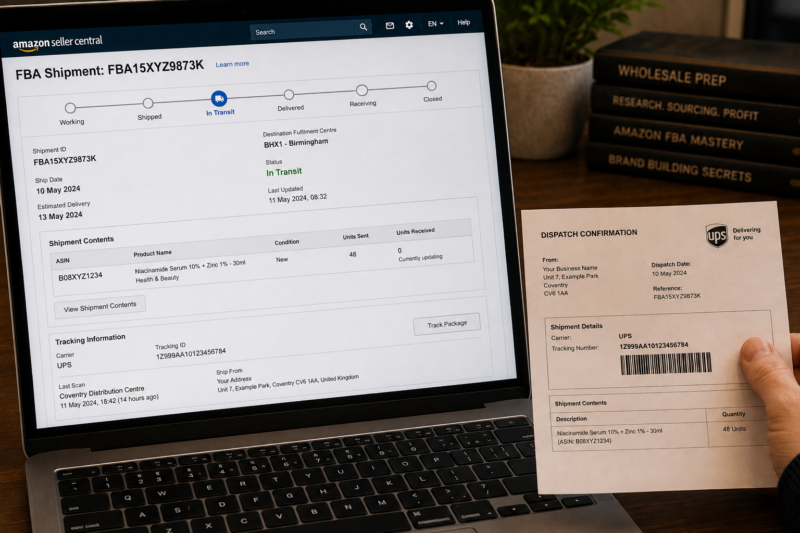
Once your courier has collected your boxes return to Seller Central and confirm that the shipment has been dispatched. This marks your shipment as In Transit in Amazon’s system and begins the receiving process timeline. After your boxes arrive at the fulfilment centre Amazon typically takes 1 to 5 business days to process and receive your stock — after which your units become available for sale and appear in your FBA inventory.
| Shipment Status in Seller Central | What It Means | Action Required |
|---|---|---|
| Working | Shipment plan created — not yet sent | Complete box content and courier booking |
| Shipped | Confirmed as dispatched — courier collected | Monitor tracking — no action needed |
| In Transit | Boxes en route to Amazon fulfilment centre | Monitor tracking — no action needed |
| Delivered | Boxes received at fulfilment centre — being processed | Wait 1 to 5 business days for receiving to complete |
| Receiving | Amazon scanning and processing your units | Check received quantity matches sent quantity |
| Closed | All units received and live in FBA inventory | Confirm received quantity — investigate any discrepancy |
Common First Shipment Mistakes to Avoid
| Mistake | Consequence | Prevention |
|---|---|---|
| No FNSKU label or label not covering original barcode | Units rejected — returned or disposed of by Amazon at your cost | Check every unit before boxing — scan each label to confirm it reads correctly |
| Sending to wrong fulfilment centre | Amazon redirects at your cost or rejects the shipment entirely | Always send to the fulfilment centre Amazon assigns in your shipment plan — never change the destination |
| Box weight over 50kg | Warehouse refuses to handle the box — returned or left unprocessed | Weigh every box before sealing — split into two boxes if over the limit |
| Box content information not entered | Amazon charges a box content compliance fee for every unit it has to manually scan | Always complete box content entry in Seller Central before confirming shipment |
| Quantity mismatch between plan and actual units sent | Receiving discrepancy raised — investigation required — units may be inaccessible temporarily | Count stock twice before entering quantities — match plan exactly to what is in the box |
Conclusion — Get the Process Right Once and It Becomes Routine
Your first FBA shipment takes longer than subsequent ones because every step is new. By your third or fourth shipment the process becomes routine — most sellers can prepare pack and book a small FBA shipment in under two hours once they know the sequence. The key is following every step in order without skipping anything — particularly the labelling check and the box content entry — which are the two most common sources of receiving problems for new sellers.
Find your next wholesale brand to stock through our Brands Directory. Research every product with Keepa. Calculate every margin with AMZScout. And send every confirmed product into FBA following the seven steps in this guide.
FIND YOUR NEXT WHOLESALE BRAND TO SHIP TO FBA
Browse 5,000+ Verified Wholesale Brands Free
Find verified wholesale trade contacts in the Brandhunterz Brands Directory — apply for your account today and have your first FBA shipment ready to dispatch within days of approval.
About the Author
This article is written by the team at Brandhunterz Ltd — a UK registered Amazon FBA wholesale sourcing company (Company No: 15342697) registered in England and Wales since 2023. Visit brandhunterz.com to learn more.