
UK AMAZON SELLERS
How to Register as an Amazon UK Seller — Step by Step Guide
By Brandhunterz Ltd | Company No: 15342697 | 12 minute read
Affiliate Disclosure: This article contains affiliate links. If you purchase through our links we may earn a commission at no extra cost to you. We only recommend tools we genuinely use and believe in. Read our full disclaimer.
Registering as an Amazon UK seller is the essential first step in launching your wholesale FBA business — and while the process is straightforward it requires specific documents correct information and a clear understanding of which account type and settings to choose during setup. Making errors during registration — entering incorrect business details choosing the wrong account type or failing to complete identity verification correctly — can cause delays of days or weeks before your account becomes fully operational. Done correctly the registration process takes between 30 minutes and 2 hours to complete and your account can be verified and active within 1 to 3 business days.
We are Brandhunterz Ltd — a UK registered wholesale sourcing company (Company No: 15342697) — and in this complete step by step guide we walk through every stage of the Amazon UK seller registration process — from what you need to prepare before you start through to completing identity verification configuring your account settings and making your first listing ready to go live.
💡 Quick Summary
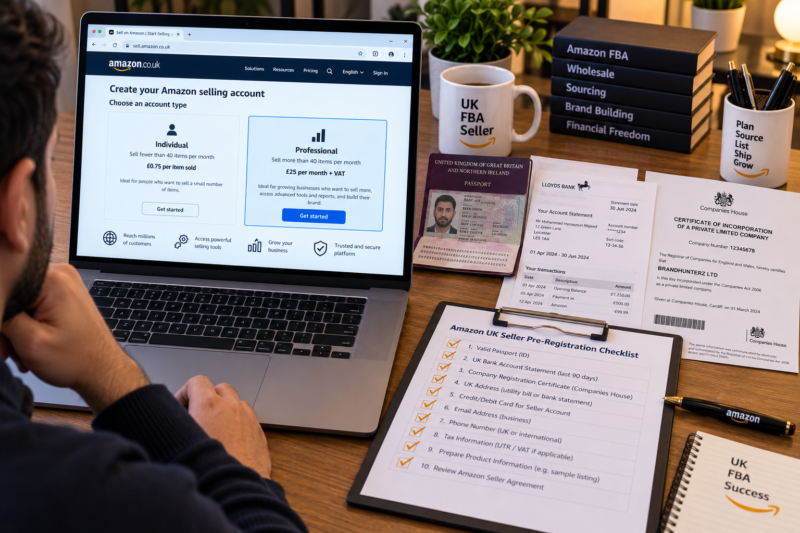
To register as an Amazon UK seller go to sell.amazon.co.uk and choose a Professional account — £25 per month plus VAT. You will need your legal name or business name and address a valid email address a phone number your bank account details for payment a government-issued photo ID a proof of address document and your tax reference number. Identity verification typically takes 1 to 3 business days. Once verified complete your seller profile configure your shipping settings add your VAT number if registered and make your first product listing. The Professional account is the correct choice for any seller planning to sell more than 35 items per month.
What You Need Before You Start
Before visiting sell.amazon.co.uk gather all of the following documents and information. Having everything ready before you begin prevents the registration from being interrupted partway through — which can cause delays if Amazon’s system flags an incomplete session:
| Document or Information Required | Details | Required For |
|---|---|---|
| Email address | A dedicated business email address — not a shared or personal address used for other Amazon accounts | All sellers |
| Phone number | A UK mobile or landline number — used for two-factor authentication and account communications | All sellers |
| Government photo ID | Valid UK passport or UK driving licence — must be current and not expired — good image quality required for upload | All sellers |
| Proof of address | Bank statement or utility bill — dated within the past 90 days — must show your full name and current address | All sellers |
| UK bank account details | Sort code and account number — must be a UK bank account in your name or your business name | All sellers |
| Tax reference number | National Insurance number for sole traders — UTR for self-employed — Company Tax Reference for limited companies | All sellers |
| Companies House registration number | Required if registering as a UK limited company — eight-digit number from your certificate of incorporation | Limited companies only |
| VAT number | Required only if already VAT registered — if not yet registered leave blank and add later when you register | VAT-registered sellers |
Individual vs Professional Account — Which to Choose
Amazon UK offers two seller account types and choosing the right one from the start matters — switching from Individual to Professional later is straightforward but starting on the wrong plan wastes time and limits your access to key features:
| Feature | Individual Account | Professional Account |
|---|---|---|
| Monthly subscription fee | None | £25 per month plus VAT |
| Per-item fee | £0.75 per item sold | None |
| Monthly sales limit | 35 items per month | Unlimited |
| Buy Box eligibility | Not eligible | Eligible |
| FBA access | Limited | Full access |
| Bulk listing tools | Not available | Available |
| Advertising access | Not available | Available |
| Recommended for wholesale FBA sellers | ❌ No | ✅ Yes — always |
The Professional account is the only viable choice for wholesale FBA sellers. Without Buy Box eligibility you cannot win the Buy Box — meaning customers cannot add your offer to their basket through the standard product page buy button. This alone makes the Individual account completely unsuitable for wholesale selling regardless of fee considerations.
The Registration Process — Step by Step
Go to sell.amazon.co.uk and Click Start Selling
Open a browser and navigate to sell.amazon.co.uk. Click the Start Selling or Sign Up button. You will be asked to log in with an existing Amazon customer account or create a new one. Use a dedicated business email address for your seller account — not a personal Amazon shopping account — to keep your selling activity clearly separated from personal purchases. If you already have an Amazon customer account with the email you want to use you can link it to your new seller account during this step.
Select Your Account Type — Choose Professional
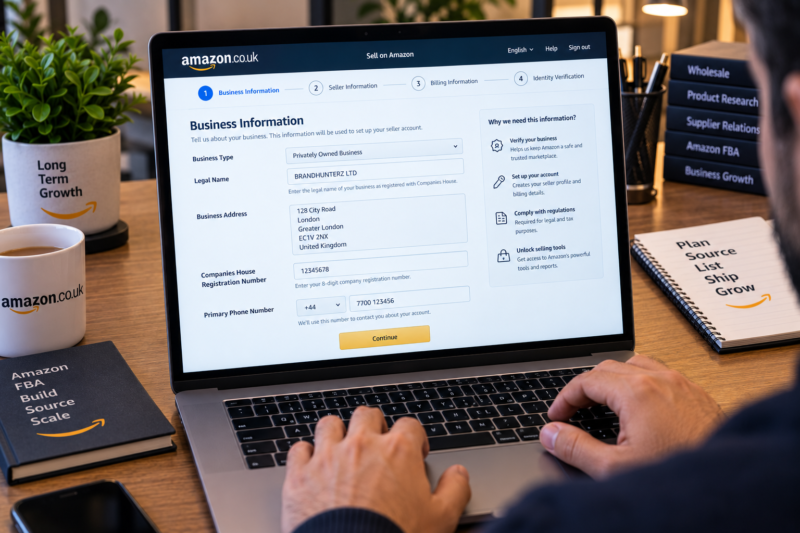
After logging in you will be presented with the account type selection screen. Select Professional — £25 per month plus VAT. Confirm your choice and proceed to the registration form. The registration form is divided into several sections — business information — seller information — billing information — store information — and identity verification. Complete each section fully and accurately before moving to the next.
Enter Your Business Information
You will be asked to select your business type — choose from Privately Owned Business for a UK limited company State Owned Business for publicly listed companies Charity for registered charities or None I am an individual for sole traders. Enter your legal business name exactly as it appears on your Companies House registration if you are a limited company or your full legal name if you are a sole trader. Enter your registered business address — this must match the address on your proof of address document. Enter your company registration number if applicable and your primary business phone number.
Enter Your Personal and Billing Information
Enter the details of the primary account holder — typically the business owner or director. You will need to provide your full legal name date of birth residential address and the last four digits of a payment card for billing the monthly Professional subscription fee. If you are registering as a limited company you will be asked for the details of all beneficial owners and directors holding 25% or more of the business — this is part of Amazon’s anti-money-laundering compliance requirements.
Add Your Bank Account for Disbursements
Enter your UK bank account sort code and account number. This is the account Amazon will pay your sales proceeds into — typically every 14 days by default. The bank account must be in your name or your business name and must be a UK-based account. Amazon does not currently support payment to international bank accounts for UK marketplace sales — if you do not have a UK bank account you will need to open one before completing registration.
Set Up Your Amazon Store Name
Enter a display name for your Amazon storefront — this is the name that appears to buyers on your seller profile and feedback page. The store name does not need to match your legal business name but it must not infringe any existing trademark — avoid using brand names you do not own. Choose a professional memorable name that reflects your business. Your store name can be changed after registration so do not let this step delay you — enter a suitable name and proceed.
Upload Your Identity Documents
Upload a clear photograph or scan of your government-issued photo ID — passport or driving licence. Then upload your proof of address — a bank statement or utility bill dated within the past 90 days. Both documents must be clear and fully legible — all four corners visible no glare or blur and all text readable. Blurry or cropped documents are the most common cause of identity verification rejection and delay. Take your document photographs in good natural light on a flat contrasting surface for the best result.
Complete Video Verification if Requested
In some cases Amazon requests a short video verification call as part of the identity verification process. This is conducted through a third-party identity verification provider — you will be asked to confirm your details show your identity document to a webcam and answer a small number of verification questions. The call is typically 5 to 10 minutes long and is scheduled at a time convenient to you. Prepare to complete this step if prompted — having your identity document to hand before scheduling the call.
After Registration — Essential Account Configuration
Once your account is verified and active there are several important configuration steps to complete before you make your first listing. Skipping these steps means your account is not properly set up for professional FBA selling:
| Configuration Step | Where in Seller Central | What to Set |
|---|---|---|
| VAT number | Settings — Tax Settings | Add your UK VAT number if registered — required to ensure VAT is correctly applied on your sales |
| Shipping settings | Settings — Shipping Settings | Set your default handling time and working days — even as an FBA seller this affects any merchant-fulfilled listings you create |
| Notification preferences | Settings — Notification Preferences | Enable email notifications for Account Health — A-to-Z Claims — Feedback — and Policy Violations |
| Two-step verification | Settings — Login Settings | Enable two-step verification on your seller account — essential security for protecting your account from unauthorised access |
| Return settings | Settings — Return Settings | Confirm your FBA return settings are correctly configured — Amazon handles FBA returns automatically but you need to review the settings |
| Disbursement schedule | Settings — Account Info — Payment Information | Confirm your bank account is correctly linked and your disbursement schedule is set — default is every 14 days |
Common Registration Mistakes to Avoid
The following are the most common mistakes made during Amazon UK seller registration — each capable of causing delays of days to weeks in your account becoming fully operational:
| Mistake | What Goes Wrong | How to Avoid It |
|---|---|---|
| Using a personal email address already linked to a buyer account | Amazon flags the dual use — can cause account linking issues | Create a dedicated business email address for your seller account before registering |
| Blurry or incomplete ID document photographs | Identity verification fails — re-upload required — 3 to 5 day delay | Photograph documents in good natural light on a flat contrasting surface — all four corners visible — all text readable |
| Proof of address older than 90 days | Amazon rejects out-of-date documents — re-upload required | Check the date on your bank statement or utility bill before uploading — must be within the past 90 days |
| Mismatched name or address between documents | Amazon flags the inconsistency — manual review triggered — significant delay | Ensure the name and address on your ID match your proof of address and your registration form exactly |
| Choosing Individual account instead of Professional | No Buy Box eligibility — FBA access limited — must upgrade to Professional before selling effectively | Always select Professional from the start — the monthly fee is recovered from your first few sales |
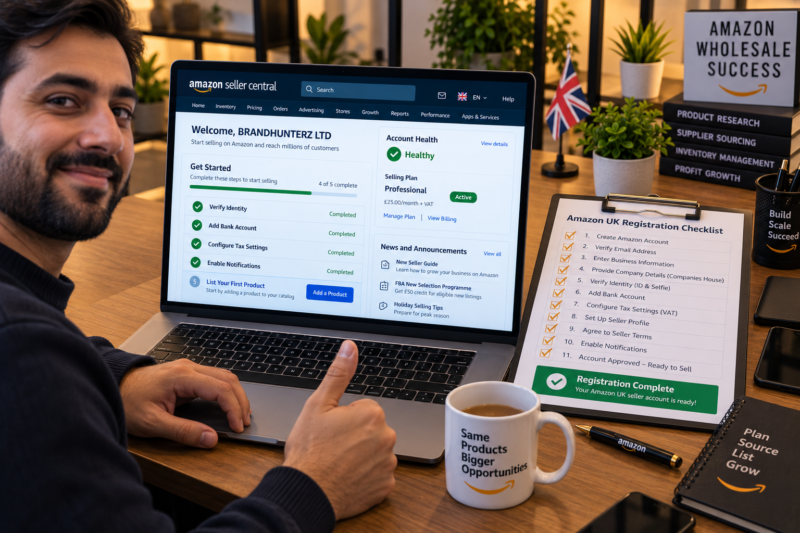
Your Amazon UK Registration Checklist
| Registration and Setup Step | Done |
|---|---|
| Dedicated business email address created for seller account | ☐ |
| All required documents gathered — ID proof of address bank details tax reference | ☐ |
| Professional account selected at sell.amazon.co.uk | ☐ |
| Business information entered correctly — name address registration number | ☐ |
| UK bank account added for disbursements | ☐ |
| Store name entered — professional and trademark-safe | ☐ |
| ID and proof of address uploaded — clear photographs — all text readable | ☐ |
| Identity verification completed — account confirmed active | ☐ |
| VAT number added to Tax Settings if VAT registered | ☐ |
| Notification preferences enabled — Account Health A-to-Z Claims Feedback Policy Violations | ☐ |
| Two-step verification enabled on account | ☐ |
| Amazon UK seller account fully registered configured and ready to list | ✅ Ready |
Conclusion — Get the Registration Right and Everything Else Follows
Your Amazon UK seller account is the foundation of your entire FBA business — every listing every shipment every payment and every customer interaction flows through it. Registering correctly choosing the Professional plan from the start completing identity verification with clean clear documents and configuring your account settings properly before your first listing gives you the best possible start. The sellers who face the most problems in the early days are almost always those who rushed through the registration process — entered incorrect details or used unsuitable documents — and then spent their first weeks dealing with account restrictions rather than finding products and making sales.
Once your account is live and configured find your first wholesale products through our Brands Directory — research demand with Keepa — and confirm your margins with AMZScout before placing your first order.
ACCOUNT REGISTERED — NOW FIND YOUR FIRST PRODUCT
Browse 5,000+ Verified UK Wholesale Brands Free
Find verified wholesale trade contacts in the Brandhunterz Brands Directory — apply for your first trade account source your first products and start building your Amazon UK FBA business today.
About the Author
This article is written by the team at Brandhunterz Ltd — a UK registered Amazon FBA wholesale sourcing company (Company No: 15342697) registered in England and Wales since 2023. Visit brandhunterz.com to learn more.