
HOW TO START AMAZON FBA · 2026
How to Send Your First Shipment to Amazon FBA Warehouses
By Brandhunterz Ltd | Company No: 15342697 | 13 minute read
Affiliate Disclosure: This article contains affiliate links. If you purchase through our links we may earn a commission at no extra cost to you. We only recommend tools we genuinely use and believe in. Read our full disclaimer.
Sending your first shipment to an Amazon FBA warehouse is one of the most satisfying milestones in your journey as a new seller. It means your research is done your wholesale order has arrived and you are about to become a live Amazon seller with real inventory inside one of the world’s most powerful retail fulfilment networks. But the process has specific requirements and common beginner mistakes at this stage can result in shipment delays inventory rejections and avoidable fees.
We are Brandhunterz Ltd — a UK registered wholesale sourcing company (Company No: 15342697) — and in this complete step-by-step guide we walk you through exactly how to create your first FBA shipment in Seller Central prepare your inventory correctly and send your stock to Amazon’s fulfilment centres without errors delays or unnecessary fees.
💡 Quick Summary
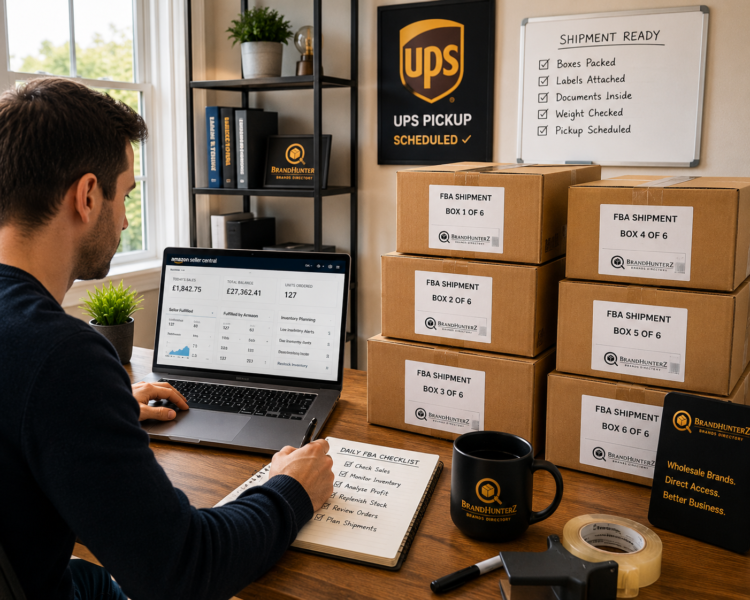
Creating your first FBA shipment involves five stages — adding your products to FBA in Seller Central, preparing your inventory with correct labelling, packing your cartons to Amazon’s standards, creating the shipment plan and printing box labels, and booking your courier collection. Use Amazon’s Partnered Carrier Programme for discounted inbound shipping rates. The full process takes 2 to 4 hours for a first shipment and 30 to 60 minutes for experienced sellers.
Before You Start — What You Need Ready
Before creating your FBA shipment in Seller Central gather everything you need so the process runs smoothly from start to finish. Stopping midway through a shipment creation to find missing information or equipment can cause errors in the shipment plan that are difficult to correct once submitted.
✅ Pre-Shipment Checklist
- Your wholesale inventory counted and checked for damage
- Product ASINs confirmed and added to your Seller Central inventory
- A label printer or access to a standard printer for labels
- Adhesive label sheets or a label gun with barcodes
- Sturdy corrugated cardboard cartons for packing
- Packing tape and bubble wrap or void fill material
- A tape measure and postal scale for carton dimensions and weight
- Your Seller Central account open and ready in a browser
Step 1 — Add Your Products to FBA in Seller Central
The first step is ensuring all the products you want to send to FBA are listed in your Seller Central inventory and set to Fulfilment by Amazon. If you have already created listings for these products but set them to Merchant Fulfilled you need to convert them to FBA before creating your shipment.
Go to Manage Inventory in Seller Central
Log into Seller Central and navigate to Inventory then Manage Inventory. Find the product you want to send to FBA. If the product is already listed as FBA you will see a Send/Replenish Inventory button in the Actions column. If it shows as Merchant Fulfilled select Change to Fulfilled by Amazon from the Actions dropdown to convert it.
Add New Products if Not Yet Listed
If your products are not yet listed in Seller Central go to Inventory then Add a Product. Search for the product by its ASIN EAN or product name. For wholesale products the listing will almost always already exist on Amazon — you are matching your offer to an existing listing rather than creating a new one. Select the correct listing and choose Fulfilled by Amazon as your fulfilment method.
Click Send/Replenish Inventory
Once your products are set to FBA click the Send/Replenish Inventory button in the Actions column next to the product. This takes you to the shipment creation workflow where you will enter your shipment details and quantities. If you are sending multiple products in one shipment you can add all products to a single shipment plan by repeating this process and choosing to add them to an existing open shipment plan.
Step 2 — Set Your Ship From Address and Packing Type
The shipment creation workflow begins by asking for your ship from address — the location where Amazon will collect or where you will drop off your shipment. This should be your home address business address or the address of your supplier if they are shipping directly to FBA on your behalf. Enter the address carefully as it determines which courier options are available to you through Amazon’s Partnered Carrier Programme.
Next select your packing type. Amazon gives you two options:
| Packing Type | When to Use | Best For |
|---|---|---|
| Individual Products | Each carton contains mixed products or a single product type in varying quantities | New sellers sending mixed first shipments |
| Case Packed Products | Each carton contains the same product in the same quantity — exactly as received from supplier | Most wholesale shipments — simpler and faster |
For most wholesale shipments where you receive stock in original supplier cases choose Case Packed Products. Enter the number of units per case and the number of cases you are sending. Amazon will calculate the total units automatically. If you are sending a mixed shipment with multiple products in the same carton choose Individual Products instead.
Step 3 — Prepare Your Inventory for FBA
Amazon has specific requirements for how products must be prepared before they are received at a fulfilment centre. Sending products that do not meet Amazon’s preparation requirements can result in the shipment being refused additional preparation fees being charged by Amazon or your inventory being stranded at the fulfilment centre while Amazon contacts you for instructions.
Barcoding Requirements
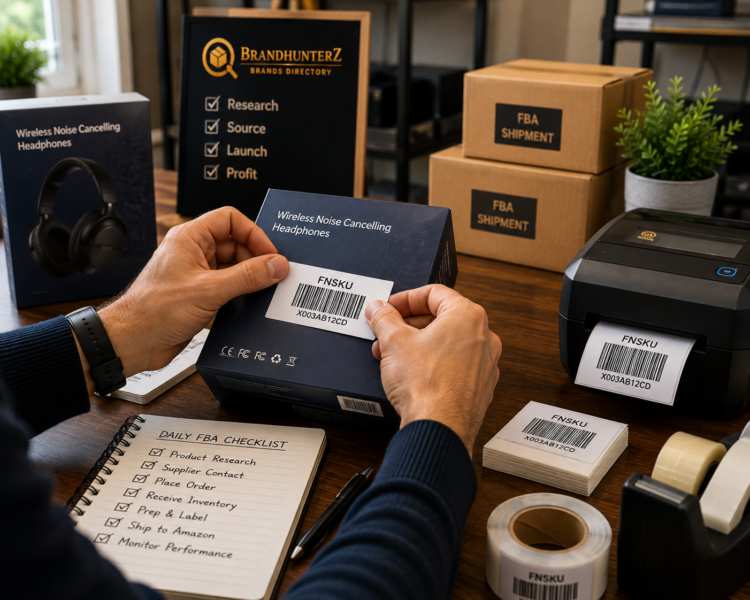
Every unit you send to FBA must have a scannable barcode that Amazon can use to identify and receive it into their system. For most branded wholesale products the original manufacturer barcode (EAN or UPC) is already on the packaging and is sufficient. However Amazon may require you to apply an Amazon-specific FNSKU label over the original barcode if the product participates in Amazon’s commingled inventory programme or if the manufacturer barcode is shared across multiple product variations.
Check in Seller Central whether your products require FNSKU labelling. If they do print the FNSKU labels from the Label Products section of your shipment plan and apply them carefully over the original barcode using a label that completely covers the existing barcode without leaving any gaps around the edges.
Packaging Requirements
Amazon requires all products sent to FBA to be packaged in a way that protects them during storage and fulfilment. For most standard branded consumer goods in their original retail packaging no additional preparation is required. However certain product types have specific packaging requirements you must follow:
| Product Type | Amazon Requirement |
|---|---|
| Liquids and Gels | Must be sealed and bagged in a secure poly bag — no loose caps or open containers |
| Fragile Glass Items | Must be bubble wrapped and able to survive a 3-foot drop test onto a hard surface |
| Loose Accessories or Bundles | Must be secured together in a poly bag or box clearly identified as a set |
| Small Units Under 2.5cm | Must be in a sealed poly bag or box to prevent loss in the fulfilment centre |
| Expiry Date Products | Must display expiry date clearly on outside of packaging — minimum 90 days remaining shelf life |
Step 4 — Pack Your Cartons Correctly
Amazon has specific requirements for how cartons must be packed and labelled before being accepted at a fulfilment centre. Incorrect carton packing is one of the most common causes of shipment delays and additional fees for new FBA sellers.
Do Not Exceed Amazon’s Maximum Carton Weight of 23kg
Amazon will not accept individual cartons that exceed 23kg in weight. If your product is heavy pack fewer units per carton to stay under this limit. Overweight cartons will be refused at the fulfilment centre and returned to you at your cost. Always weigh your packed cartons before sealing them.
Do Not Use Damaged or Weak Cardboard Cartons
Amazon’s fulfilment centres handle thousands of cartons daily through automated sorting systems. Weak or damaged cartons can split open during transport causing inventory loss and additional handling fees. Use strong double-walled corrugated cardboard cartons — never use supermarket boxes or single-wall cartons for FBA shipments containing multiple units.
Do Not Leave Void Space Inside Cartons
Cartons with excessive void space can be crushed during transit causing damage to the contents. Fill all void space with packing paper bubble wrap or air pillows. The products inside should feel secure and not move when you shake the sealed carton. A properly packed carton should have less than 5cm of movement in any direction when sealed.
Remove or Cover All Previous Shipping Labels
If you are reusing cartons from your wholesale supplier delivery remove or completely cover all existing labels and barcodes before applying your Amazon shipment labels. Multiple barcodes on a carton confuse scanning systems at Amazon’s fulfilment centres and can cause your inventory to be misrouted or delayed in processing.
Step 5 — Enter Carton Dimensions and Print Box Labels
With your cartons packed and sealed return to your Seller Central shipment plan and enter the dimensions and weight of each carton. Measure the length width and height of the sealed carton in centimetres and weigh it in kilograms. These measurements determine your shipping cost through Amazon’s Partnered Carrier Programme so measure carefully — inaccurate measurements can result in additional charges.
Once you have entered your carton details Amazon will generate your box labels — unique barcodes that identify each carton in your shipment and direct them to the correct processing area at the fulfilment centre. Print these labels on standard A4 paper or adhesive label sheets and apply one label to each carton on a flat easily visible surface — typically the largest face of the carton away from the opening seam.
Step 6 — Choose Your Shipping Method and Book Collection
The final step is selecting your shipping method and booking your collection or drop-off. Amazon offers two main inbound shipping options for UK sellers:
| Shipping Option | Description | Best For |
|---|---|---|
| Amazon Partnered Carrier (UPS) | Discounted UPS rates negotiated by Amazon — booked directly in Seller Central — typically 30 to 50% cheaper than standard UPS | Most new sellers — best value |
| Non-Partnered Carrier | Your own courier account — Parcelforce DPD Royal Mail or any carrier — you book and pay separately outside Seller Central | Sellers with existing courier contracts offering better rates |
For your first shipment use Amazon’s Partnered Carrier Programme. Select UPS as your carrier in Seller Central and enter your carton count dimensions and weights. Amazon will show you the estimated shipping cost before you confirm. The cost is charged to your seller account and deducted from your next payment disbursement. Once confirmed Amazon generates your UPS labels which you print and apply to each carton alongside your box labels. Book the UPS collection for your preferred date directly through Seller Central — typically the next available business day.
💡 How Long Does Amazon Take to Receive FBA Inventory?
After UPS collects your shipment Amazon typically receives and begins processing it within 3 to 5 business days. Your inventory then goes through a receiving and stowing process that usually takes a further 2 to 5 business days before it shows as Available in your FBA inventory. The total time from collection to available for sale is typically 5 to 10 business days. Plan your first order quantity to allow for this lead time before you run out of stock on any existing listings.
After Your Shipment Is Received — What to Monitor
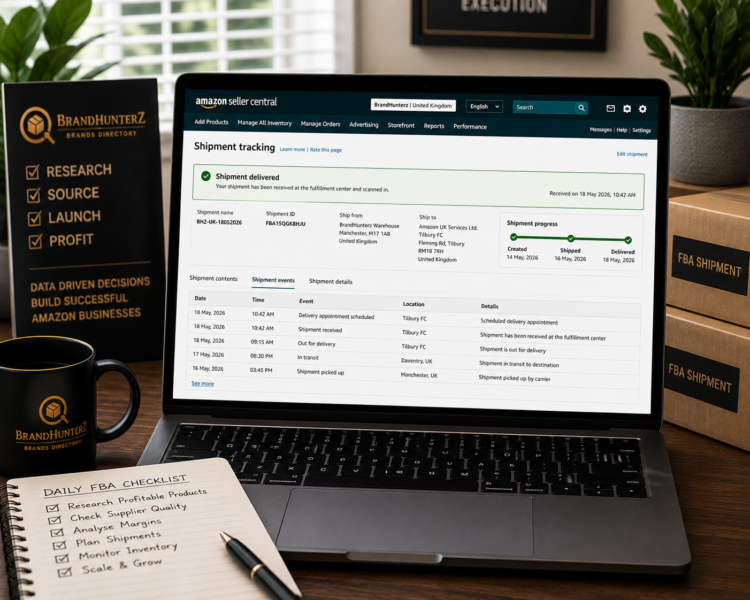
Once your shipment is delivered to Amazon’s fulfilment centre track its progress in Seller Central under Shipments in the FBA section. You will see the status update from Shipped to In Transit to Delivered to Checked In to Receiving to Closed as Amazon processes your inventory. Monitor each status change and act promptly if Amazon flags any discrepancies between the units you declared in your shipment plan and the units they actually received.
Reconciling Inventory Discrepancies
If Amazon’s received count differs from your declared shipment quantity by more than a few units open a reconciliation request in Seller Central within 90 days of the shipment being marked as Closed. Amazon’s receiving process is highly accurate but discrepancies do occasionally occur — typically due to damaged units being set aside or units arriving in a damaged carton being counted separately. Always keep a copy of your packing list showing exactly how many units were in each carton as supporting documentation for any reconciliation request.
Setting Your Selling Price
Once your inventory shows as Available in Seller Central ensure your selling price is set correctly to compete for the Buy Box. Check the current Buy Box price on the product listing and set your price at or marginally below it. Avoid dropping your price significantly below the Buy Box price in an attempt to win sales faster — this can trigger a price war with other sellers that destroys everyone’s margins including yours.
Common First Shipment Mistakes to Avoid
Sending Inventory Without Completing the Shipment Plan First
Never send inventory to an Amazon fulfilment centre without first creating a complete shipment plan in Seller Central and receiving your confirmed box labels. Sending unannounced inventory results in it being refused at the receiving dock or held for extended periods without being processed. Every carton entering an Amazon fulfilment centre must have a valid shipment plan reference.
Sending to the Wrong Fulfilment Centre
Amazon assigns specific fulfilment centres to each shipment based on their current inventory distribution needs. Always send your shipment to the exact fulfilment centre address shown in your shipment plan — do not change the destination or combine shipments destined for different fulfilment centres into a single delivery. Sending inventory to the wrong centre causes significant processing delays.
Sending Products With Insufficient Shelf Life Remaining
Amazon requires all products with expiry dates to have a minimum of 90 days remaining shelf life from the date they arrive at the fulfilment centre. Products arriving with less than 90 days remaining will be rejected and returned to you at your cost. Always check manufacturing and expiry dates when your wholesale order arrives and before creating your FBA shipment for any consumable product.
Frequently Asked Questions
How Much Does It Cost to Send a Shipment to Amazon FBA?
Using Amazon’s Partnered Carrier Programme with UPS the inbound shipping cost for a typical first shipment of 2 to 4 cartons weighing 10 to 20kg total is usually between £8 and £25. The exact cost depends on the total weight and dimensions of your cartons and the distance to the assigned fulfilment centre. This is significantly cheaper than booking UPS directly — typically 30 to 50 percent less than standard UPS retail rates.
Can My Supplier Send Direct to Amazon FBA?
Yes — many wholesale suppliers will ship your order directly to Amazon’s fulfilment centre on your behalf. This is called direct-to-FBA shipping and can save you significant time and handling costs. You create the shipment plan in Seller Central first and provide your supplier with the fulfilment centre address and your Amazon box labels. The supplier applies the labels to the cartons and ships directly using their own courier account. Not all suppliers offer this service so confirm before ordering.
What Happens if Amazon Loses My Inventory?
Amazon’s FBA inventory reimbursement policy covers inventory that is lost or damaged while in Amazon’s care. If units go missing during the receiving process or are damaged in the fulfilment centre Amazon will reimburse you at the estimated sale price of the unit minus applicable fees. Open a reimbursement request in Seller Central if you notice inventory discrepancies after your shipment is closed — Amazon typically resolves these within 30 business days.
How Many Units Should I Send in My First Shipment?
For your first wholesale shipment send a conservative quantity that validates your sales velocity without overcommitting capital. A starting quantity of 24 to 48 units per product is typically sufficient to confirm real demand build your initial seller metrics and generate enough revenue to fund your next reorder. Once your sell-through rate confirms the product is performing as expected increase your reorder quantity on subsequent orders.
Related Articles — Keep Learning
- How to Start Amazon FBA in 2026 — Complete Beginner Guide
- How to Open an Amazon Seller Central Account Step by Step
- How to Find Your First Wholesale Product to Sell on Amazon FBA
- How to Calculate Amazon FBA Fees and Profit Margins
- How to Get Ungated on Amazon — A Beginner’s Guide
- How to Read a Keepa Graph for Amazon FBA Wholesale Research
- Browse the Brandhunterz Brands Directory — Free Access
- Amazon FBA and eBay Wholesale Courses by Brandhunterz
READY TO SOURCE YOUR FIRST WHOLESALE PRODUCT?
Browse Verified Wholesale Brands — Free Access
Now you know how to send your first FBA shipment the next step is finding the wholesale brands worth sourcing. The Brandhunterz Brands Directory gives you instant free access to verified wholesale brands with real trade contacts confirmed Amazon FBA approval status and minimum order values.
About the Author
This article is written by the team at Brandhunterz Ltd — a UK registered Amazon FBA wholesale sourcing company (Company No: 15342697) registered in England and Wales since 2023. Visit brandhunterz.com to learn more.