
AMAZON FBA WHOLESALE TIPS
How to Open an Amazon Seller Account in the UK — Complete Step by Step Guide
By Brandhunterz Ltd | Company No: 15342697 | 13 minute read
Affiliate Disclosure: This article contains affiliate links. If you purchase through our links we may earn a commission at no extra cost to you. We only recommend tools we genuinely use and believe in. Read our full disclaimer.
Opening an Amazon Seller account in the UK is the essential first step for any Amazon FBA wholesale seller — and while the process itself is straightforward there are specific decisions you make during registration that have a lasting impact on your business. Choosing the wrong account type, registering under the wrong business name or missing key verification steps can create complications that take weeks to resolve and delay your first wholesale order significantly.
We are Brandhunterz Ltd — a UK registered wholesale sourcing company (Company No: 15342697) — and in this complete step by step guide we walk you through every stage of opening an Amazon UK Seller Central account correctly from the beginning — covering the documents you need, the decisions you must make and the mistakes that catch most new sellers out.
💡 Quick Summary
Always open an Amazon Professional Seller account — not Individual — at £34.99 per month. Register under your UK Ltd company name not your personal name. Have your national ID, bank statement, company registration documents and credit card ready before starting. The verification process takes 1 to 5 business days after submitting documents.
Before You Start — What You Need to Prepare
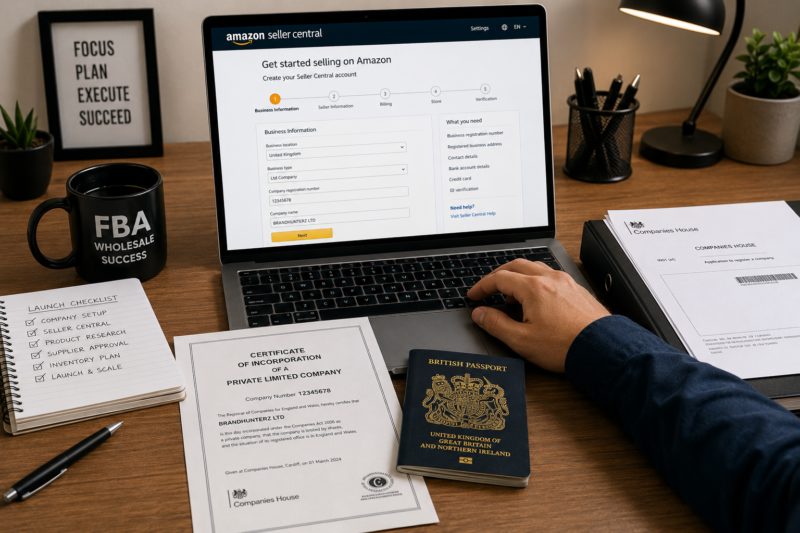
The Amazon UK Seller Central registration process requires identity verification through Amazon’s Know Your Customer (KYC) process. Having all your documents ready before you begin prevents delays and reduces the risk of your application being paused mid-registration. Gather all of the following before you start:
| Document Required | Accepted Format | Notes |
|---|---|---|
| Government-issued photo ID | Passport or driving licence | Must be valid and not expired |
| Bank account statement | Business or personal — last 90 days | Must show name and address clearly |
| Company registration documents | Certificate of Incorporation | Required for Ltd company registration |
| Credit or debit card | Visa Mastercard or Amex | For monthly subscription fee payment |
| Business bank account details | Sort code and account number | For Amazon disbursements — must match company name |
| Phone number | Mobile number for SMS verification | Used throughout the process |
| Email address | Company domain email recommended | Never use a personal Gmail for business accounts |
💡 Critical — Register Your Company First
If you have not yet registered your UK Limited Company do this before starting your Amazon Seller Central registration. Your Seller Central account name must match your company name exactly — and your bank account disbursement name must also match. Register at gov.uk/register-a-company for £12. The whole process takes a few hours and your company number is issued the same day.
Individual vs Professional Account — Always Choose Professional
Amazon UK offers two types of seller accounts and choosing the right one from the start is critical for wholesale sellers.
| Feature | Individual | Professional |
|---|---|---|
| Monthly Fee | £0 but £0.75 per item sold | £34.99/month — no per item fee |
| Buy Box Eligible | No | Yes |
| FBA Access | No | Yes |
| Bulk Listing Upload | No | Yes |
| Advanced Reports | No | Yes |
| Ungating Applications | No | Yes |
| Advertising Access | No | Yes |
Individual accounts are not Buy Box eligible and cannot use FBA — making them completely unsuitable for Amazon FBA wholesale selling. Always register as a Professional seller. The £34.99 monthly fee is fully justified from your very first wholesale sale.
Step by Step — Opening Your Amazon UK Seller Account
Go to sellercentral.amazon.co.uk
Navigate to sellercentral.amazon.co.uk and click Sign Up. Do not use your personal Amazon shopping account to register — create a new account using your company domain email address. Using a personal account creates complications if you ever want to separate your business and personal Amazon activity.
Choose Your Account Type — Professional
Select the Professional selling plan at £34.99 per month. You will be asked to enter your credit or debit card details at this stage. Amazon charges the first month’s subscription fee immediately upon registration — there is no free trial period.
Enter Your Business Information
Enter your registered UK Limited Company name exactly as it appears on your Companies House Certificate of Incorporation. Enter your company registration number, registered business address and business type. Select Limited Company as your business type. This information must be accurate — any discrepancy with your Companies House registration can trigger additional verification requests.
Enter Your Personal Information as Director
Amazon requires personal details for the primary account holder and beneficial owners of the company — anyone who owns 25 percent or more of shares. Enter your full legal name date of birth residential address and national identity information. This information is used for identity verification and is kept secure by Amazon.
Add Your Marketplace — Amazon UK
Select Amazon.co.uk as your primary marketplace. If you plan to sell on Amazon.com (USA) you can add additional marketplaces later through the Global Selling section of Seller Central. Do not try to register for multiple marketplaces simultaneously in your first registration — add them one at a time once your UK account is fully verified and active.
Set Up Your Bank Account for Disbursements
Enter your UK business bank account details — sort code and account number — for Amazon disbursements. The account holder name must exactly match your registered company name in Seller Central. If there is any mismatch your disbursements will fail. Use your Starling Business, Monzo Business or traditional business bank account — not a personal account.
Choose Your Store Name
Your store name is the name that appears on your seller profile on Amazon — it does not need to be the same as your company name but should be professional. Keep it simple and memorable. Avoid store names that include Amazon trademarked terms or imply Amazon endorsement. You can change your store name later from Seller Central settings but it is best to set it correctly from the start.
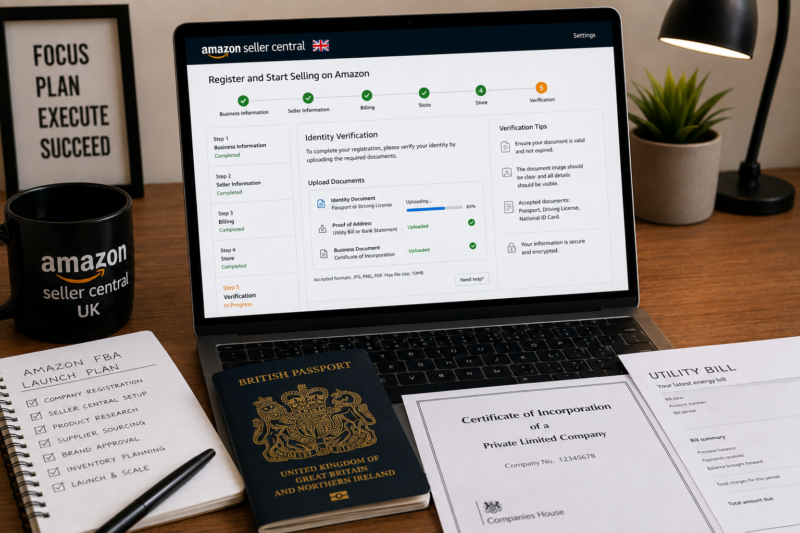
Complete Identity Verification
Amazon requires identity verification through their Know Your Customer process. You will be asked to upload clear photos or scans of your government-issued photo ID and a recent bank statement. You may also be required to complete a short video verification call where an Amazon associate verifies your identity against your documents. Have your passport or driving licence ready and ensure your bank statement is dated within the last 90 days.
Wait for Verification and Account Activation
After submitting all documents Amazon typically takes 1 to 5 business days to verify your account. You will receive email updates on the status. Some accounts are approved within hours. Others require additional documentation or clarification which Amazon will request by email. Check both your inbox and spam folder daily during this period and respond to any Amazon requests within 24 hours to avoid delays.
After Approval — Essential First Steps in Seller Central
Once your account is approved there are several important settings and configurations to complete before you start listing and shipping wholesale products. Skipping these steps causes problems later.
Step 1 — Set Up Two-Step Verification
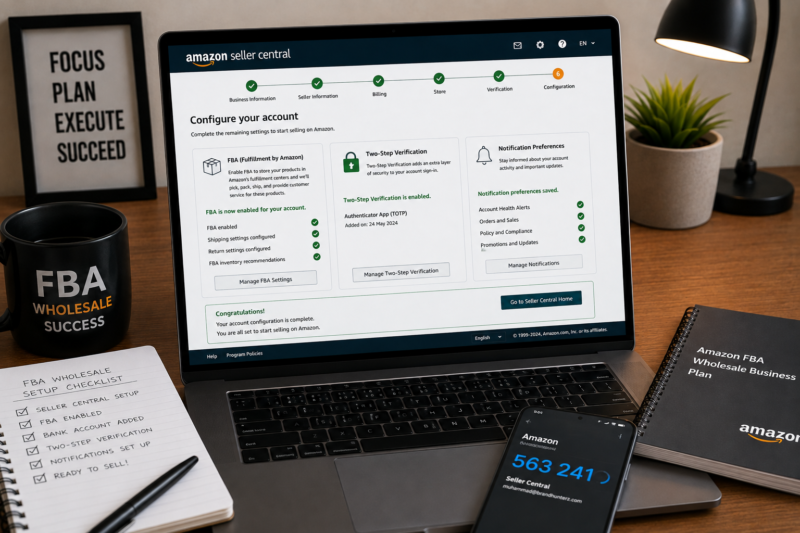
Enable two-step verification on your Seller Central account immediately. Go to Account and Settings then Login Settings. Add an authenticator app such as Google Authenticator as your primary two-step method. This is essential security protection — Amazon Seller Central accounts are targeted by hackers and a compromised account can result in unauthorised disbursements and account suspension.
Step 2 — Complete Your Seller Profile
Navigate to Stores then Manage Stores and complete your seller profile including a professional profile description, your customer service email and your returns policy. A complete professional seller profile builds customer trust and can influence feedback rates. Include your company registration number in your profile description — it signals professionalism to both customers and wholesale brands who check your Amazon presence.
Step 3 — Enable FBA
Go to Settings then Fulfilment by Amazon and complete the FBA setup. You will need to accept the FBA terms of service and configure your shipment preferences. Until FBA is enabled you cannot create FBA shipment plans or send stock to Amazon warehouses. Enable it before you place your first wholesale order so there is no delay when your stock arrives.
Step 4 — Set Up Tax Settings
If you are VAT registered enter your VAT number in the Tax Settings section of Seller Central. If you are not yet VAT registered leave this blank — you can add it later when you register for VAT. Correct VAT settings ensure Amazon displays the right tax information on your listings and invoices from day one.
Step 5 — Configure Notification Preferences
Go to Settings then Notification Preferences and enable email alerts for all critical events — buyer messages, returns, account health alerts and policy warnings. Responding quickly to buyer messages within 24 hours is required by Amazon’s performance standards and directly affects your account health metrics.
Common Registration Mistakes to Avoid
| Mistake | Consequence | How to Avoid |
|---|---|---|
| Using a personal email | Looks unprofessional — creates account confusion | Always use company domain email |
| Registering as Individual not Professional | No FBA access no Buy Box eligibility | Always select Professional plan |
| Name mismatch between account and bank | Disbursements fail — cash flow disruption | Ensure exact name match before registering |
| Submitting blurry or cropped ID documents | Verification fails — significant delays | Photograph documents in good light flat on a surface |
| Opening a second account | Both accounts suspended — permanent ban | One account per person or business entity only |
| Using a personal bank account | Name mismatch — disbursement failures | Open business bank account first |
Selling on Amazon USA From the UK
Once your Amazon UK account is active and fully verified you can add the Amazon USA marketplace through the Global Selling section of Seller Central. Amazon’s North America Unified Account allows UK sellers to sell on Amazon.com using their existing Seller Central account — you do not need to create a separate account.
To receive USD disbursements from Amazon USA you will need a USD bank account or a USD receiving account through services like Wise Business or Airwallex — both of which provide US routing numbers and account numbers compatible with Amazon Seller Central disbursements. UK sellers using Amazon USA should research their products using Keepa on the Amazon.com marketplace specifically and validate margins using AMZScout or Helium 10 for the US market specifically.
Frequently Asked Questions
Can I Register for Amazon UK Without a UK Limited Company?
Yes — Amazon UK allows sole traders and individuals to register as sellers. However for wholesale selling we strongly recommend registering a UK Limited Company first. The credibility advantage with wholesale suppliers, the professional business identity and the liability protection all make Ltd registration worth the £12 cost before starting your Amazon journey. Register at gov.uk/register-a-company — your company number is issued the same day.
How Long Does Amazon Account Verification Take?
Standard verification typically takes 1 to 5 business days after you submit all required documents. Some accounts are approved within hours. If Amazon requests additional documents or a video verification call this can extend the process by a further 3 to 7 days. Submit all documents on the same day you begin registration and respond to any follow-up requests within 24 hours to minimise delays.
What is the Amazon Professional Seller Monthly Fee?
The Amazon UK Professional Seller account costs £34.99 plus VAT per month. This fee is charged monthly to the credit or debit card you registered during account setup. In the USA the equivalent Professional account costs $39.99 per month. The monthly fee replaces the £0.75 per item sold fee charged on Individual accounts — making Professional accounts significantly more cost-effective for any seller making more than 46 sales per month.
Can I Have More Than One Amazon Seller Account?
Amazon’s policy is one Seller Central account per individual or business entity. Opening a second account without Amazon’s explicit prior approval results in suspension of both accounts — often permanently. If you have a legitimate business reason for needing a second account you must apply for approval through Seller Central before creating it. Never attempt to open a second account to circumvent a suspension or policy violation — Amazon’s detection systems are highly effective.
Related Articles — Keep Learning
- How to Find Authentic Wholesale Suppliers for Amazon FBA in the UK
- Why UK Ltd Registration Gives Amazon FBA Sellers a Major Wholesale Advantage
- How to Win the Amazon Buy Box as a Wholesale Seller
- How to Calculate Amazon FBA Profit Margins for Wholesale Products
- How to Get a Wholesale Account Approved — The Exact Email That Works
- Browse the Brandhunterz Brands Directory — Free Access
- Amazon FBA and eBay Wholesale Courses by Brandhunterz
ACCOUNT OPEN — NOW FIND YOUR FIRST WHOLESALE BRAND
Browse 5,000+ Verified Wholesale Brands Free
With your Amazon UK Seller account live the next step is finding the right wholesale brands to source. Browse our free directory of verified FBA-compatible brands with direct trade contact details.
About the Author
This article is written by the team at Brandhunterz Ltd — a UK registered Amazon FBA wholesale sourcing company (Company No: 15342697) registered in England and Wales since 2023. Visit brandhunterz.com to learn more.